How to Schedule Your Blog Posts Using NextJS?
21/10/2024 • Melvynx
Loading...
Do you have a blog post and want to schedule your posts using NextJS and Vercel?
Would you like to simply set a date in your articles like publishedAt and have your application automatically build once the date has passed?
I have a simple and effective solution for you that I've implemented.
To summarize, here's what we'll do:
To start, I assume you're using NextJS with the app router. You use front-matter to create your posts and have data like this:
---
title: "Some title",
date: 2024-10-15
published: true
---

My article...
If you have this, it's perfect.
What we'll do is create logic to not display posts with a date in the past.
Here's the kind of code I wrote:
const currentDate = new Date();
// If the post is published but its date is in the past,
// I consider the post as not published
const isPublished = data.published && isBefore(data.date, currentDate);

if (
  // I only want to hide posts that are not published in production
  process.env.NODE_ENV === 'production' &&
  !isPublished &&
  !opts.enableNotPublishedPost
) {
  continue;
}

return ...
As you can see, the logic is simple and prevents returning and displaying posts that are not yet published.
Now we'll create a static API Route that will return the posts.
// api/posts/route.ts

import { NextResponse } from "next/server";
import { getPosts } from "../../(main)/(posts)/posts-helpers";

export const GET = async () => {
  const post = await getPosts({
    limit: 3,
    order: "desc",
  });

  return NextResponse.json(post);
};
Here's the code from my application, you can see that we just return the last 3 posts.
This route will be static because we don't use headers or cookies.
It will be defined when we build the application and never change again.
This is the feature we'll use to see if there are new posts.
You'll need to make it easy to create a deployment on Vercel.
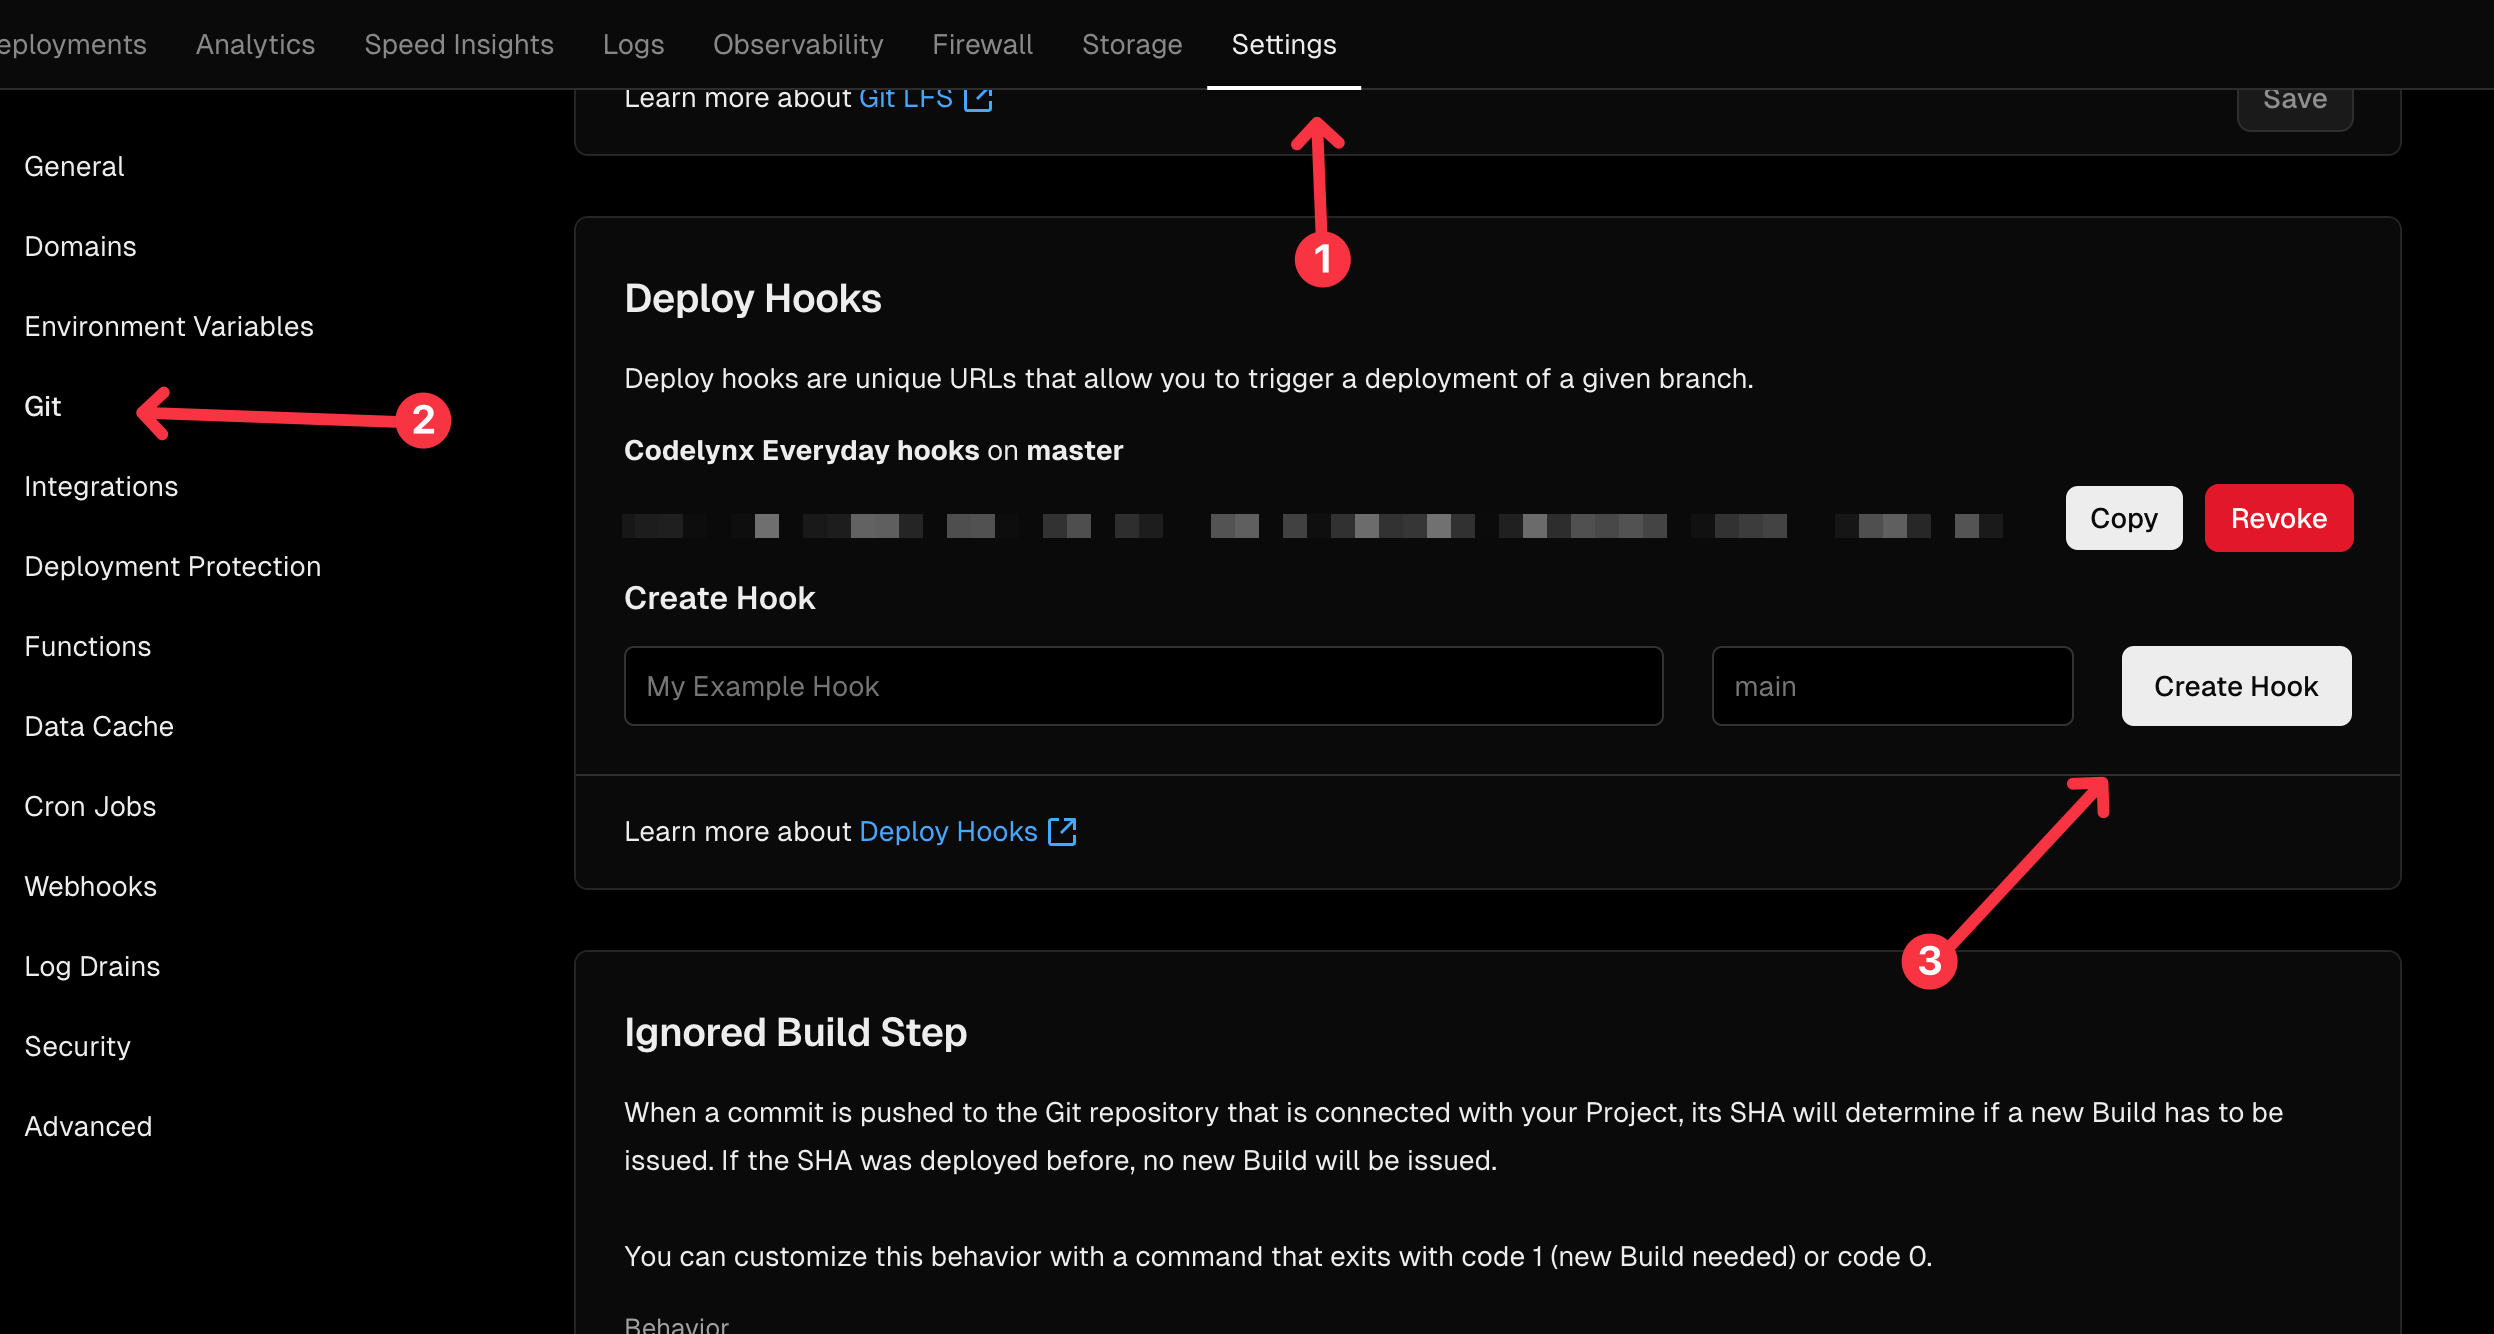
For this, you can go to your project's "Settings", then go to the "Git" submenu and scroll until you find "Deploy Hooks".
Once done, you can create a new hook and put the URL in your environment variables.
// .env

VERCEL_DEPLOY_WEBHOOKS="XXX"
Now we'll create a CRON Job. Start by creating a vercel.json file at the root of your project.
// vercel.json
{
  "crons": [
    {
      "path": "/api/cron/deploy",
      "schedule": "0 */4 * * *"
    }
  ]
}
Here I specify that I want to call the API Route /api/cron/deploy every 4 hours. Feel free to change the schedule according to your needs.
Next, we'll create a file api/cron/deploy/route.ts:
export const GET = route.handler(async (request) => {
  // Verify that it's the CRON jobs calling the method
  const authHeader = request.headers.get("authorization");
  if (authHeader !== `Bearer ${env.CRON_SECRET}`) {
    return new Response("Unauthorized", {
      status: 401,
    });
  }

  // Fetch the latest production post
  const prodPosts = await fetch("https://codelynx.dev/api/posts").then(
    async (res) => res.json() as unknown as Post[],
  );
  const latestProdPost = prodPosts[0];

  // Fetch the actual latest post
  const currentPosts = await getPosts({
    limit: 3,
    order: "desc",
  });
  const latestPost = currentPosts[0];

  if (latestPost.id === latestProdPost.id) {
    logger.info("No new post, don't deploy");
    return Response.json({ success: true });
  }

  // Deploy via webhooks
  const result = await fetch(env.VERCEL_DEPLOY_WEBHOOKS).then(async (res) =>
    res.json(),
  );

  return Response.json({ success: true });
});
This code is interesting because we use the fact that, since we consume the request with headers, NextJS will automatically transform this route into a dynamic one.
So this route will fetch the REAL latest posts, while the other route always returns the same posts between builds.
This code will ensure everything is deployed correctly like this:

If you want to better understand all these topics about NextJS, I invite you to check out my NextJS course.
I didn't think it would be "so easy" but this method finally allows me not to be stressed and to see all my posts published effortlessly.
You can have better routes using next-zod-route, a small library I made, or next-safe-action for which I made a complete guide.
Or you can just sign up for my NextJS courses: